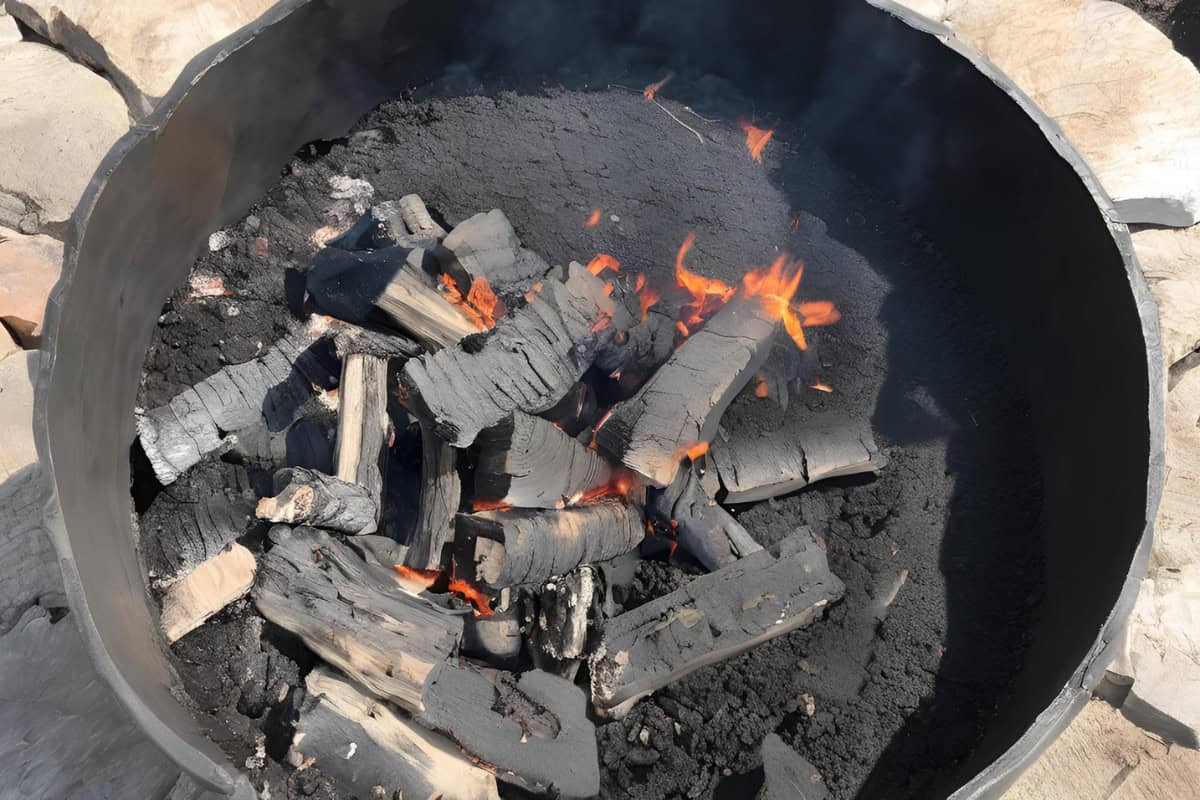
Every year, thousands of injuries and house fires start because people don’t know how to put out a fire pit the right way.
The U.S. fire departments respond to over 5,300 outdoor fire pit and heater incidents annually—many are preventable.
Learning how to put out a fire pit safely protects not only your property but also your loved ones and neighbors.
In this guide, you’ll learn exactly why safety matters, the most common risks, and the step-by-step methods for extinguishing any fire pit.
Whether you’re wrapping up a backyard gathering or looking to boost your fire pit know-how, you’ll leave with easy techniques for a safer, stress-free experience.
Table of contents

Methods to Put Out a Fire Pit Safely
Learning how to put out a fire pit is just as important as building and enjoying one. Each method offers unique benefits and risks, depending on your setup, your surroundings, and how much time you have.
Understanding the right extinguishing technique keeps you, your home, and your guests safe—and helps avoid costly mistakes.
Let the Fire Burn Out Naturally
Allowing a fire to burn out on its own can be a safe method for extinguishing your fire pit—but only if you follow essential steps.
It’s best used when you’re not in a hurry, and you’re able to stay with the fire until every last ember is cold.
**Never leave a fire unattended, even if it’s almost out.**
Keep these safety points in mind:
- Always supervise the fire until the flames and embers are completely out.
- Be patient: larger fires may take several hours to die down naturally.
- Clear away any flammable objects or dry brush nearby to prevent accidental spread.
- Avoid this method during windy conditions or drought, when embers may rekindle or spread.
This approach is not safe if you need to leave the area before the fire is cool to the touch. Curious about the risks of walking away too soon?
Water Extinguishing
Putting out a fire pit with water is a quick and effective way to stop the burn.
Here’s a step-by-step guide for using water safely:
- Let the fire burn down: Wait for flames to subside and logs to become embers.
- Pour water slowly: Using a hose or a large bucket, pour water gradually over the embers. Never dump water quickly, as this can cause hot ash to blow out.
- Stir the ashes: Use a shovel or long stick to mix the wet ashes, making sure all hot spots are soaked.
- Repeat: Continue adding water and stirring until you see no more steam or hissing sounds.
- Check for heat: Hold your hand above the ashes—they should feel completely cool before you finish.
Cautions about materials:
- Metal fire pits handle rapid cooling better, but excess water can cause rust. Learn how to prevent damage by following tips for Preventing Fire Pit Rust
- Stone or concrete fire pits may crack if hit with cold water while still hot. Allow to cool slightly before dousing.
How much water do you need? Plan on at least a few gallons for a small fire pit—more for larger fires or thicker logs.
Disposing of wet ashes: Once everything is cold, collect ashes in a metal container. Store far from your home and other flammables until you’re sure there’s no leftover heat.
Fire Pit Snuffer Method
Using a fire pit snuffer—essentially a heavy, fitted metal lid—cuts off oxygen and puts out your fire safely. This method is clean and quick if your fire pit supports it.
How to use a snuffer effectively:
- Wait for flames to decrease and coals to be glowing, not flaming.
- Place the snuffer lid securely over the opening so no air can get in.
- Leave the snuffer on for at least 30-60 minutes, then check to ensure everything is cool.
- Never touch the lid directly after use—it will be hot.
Proper sizing and safety: Make sure your snuffer fully covers the fire pit’s opening. If it’s too small, air will get in, and the fire could smolder for hours.
Pros:
- No water or dirt cleanup
- Keeps embers contained during the cool-down
- Good for metal and some stone fire pits
Cons:
- Not all pits can use a snuffer
- Initial cost of the lid
- Can take longer if wood is still burning
Best uses: Opt for a snuffer when you want a mess-free solution and plan to monitor until the fire is fully out.
Sand and Dry Dirt Method
Smothering your fire pit with sand or dry dirt is a straightforward way to block oxygen and put out flames, especially in remote locations or places with water restrictions.
How to do it safely and cleanly:
- Keep a bucket of sand or dry dirt nearby while your fire burns.
- Once the fire is low, gently shovel sand or dirt over the embers until they’re completely covered.
- Stir the ashes with a stick or shovel for even coverage.
- Allow everything to cool for at least an hour.
Tips to minimize mess:
- Use only dry, clean sand or dirt to avoid adding moisture or debris.
- Lay down a tarp or tray under the fire pit edge to catch overflow if you’re worried about cleanup.
- Remove cooled ashes and excess sand with a metal scoop, disposing of them far from combustible materials.
Best environments for this method:
- Campgrounds or parks where water isn’t available
- Areas with local regulations against dumping water on fires
- Natural settings with easy access to clean, dry dirt
Sand and dirt are practical, especially when water isn’t an option or you’re camping away from home.
Always double-check that no embers remain hidden before leaving your fire pit.
Essential Safety Equipment for Fire Pit Owners
Having the right safety equipment on hand isn’t just smart—it’s necessary if you want to enjoy your fire pit without unnecessary risk.
Anyone learning how to put out a fire pit safely should take a hard look at their backyard setup and make sure every safety box is checked before lighting up.
Well-chosen equipment serves as your backup plan, helping you handle unplanned sparks, shifting winds, or unexpected flare-ups quickly and effectively.
Let’s break down what items every fire pit owner should have within arm’s reach, and how each plays an important role in reliable fire control.
Fire Extinguisher
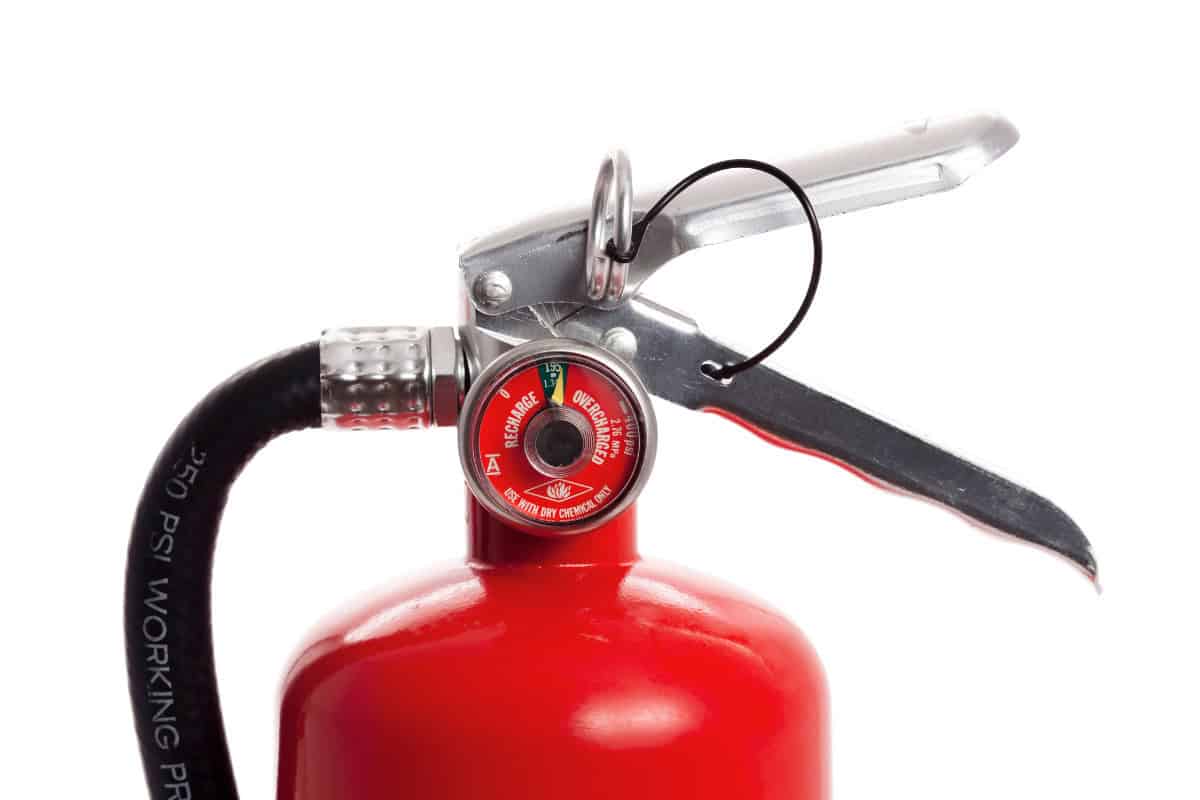
A compact yet powerful fire extinguisher is a must-have near any fire pit. Choose a model rated for wood, paper, and trash (Class A) or multipurpose (Class ABC).
Store it close to your fire pit so you don’t have to hunt for it if things heat up. Test your extinguisher annually and make sure everyone in your household knows how to use it.
- Place the extinguisher outside but protected from rain.
- Check the expiration date regularly.
- Use the pull, aim, squeeze, and sweep (PASS) method for fast response.
Metal Fire Screen or Snuffer Lid
These covers create a sturdy barrier that helps keep embers from escaping and can suffocate the fire more quickly when you need to put it out.
A fire pit snuffer lid is especially helpful when you want a no-fuss way to close things down for the night.
- Use a screen while burning to contain sparks.
- Place the snuffer lid over dying embers to cut off oxygen.
Sand or Dirt Supply
Keeping a small bucket of sand or dry dirt handy is a classic, low-tech safety solution. This material smothers flames and hot spots faster than you might think.
Just scoop and spread—no fancy tools needed.
- Store in a weatherproof bucket within reach of your fire pit.
- Sand is especially handy at remote sites or where water use is limited.
Water Source: Bucket or Hose
Nothing beats having a full bucket of water or a garden hose nearby. You can wet down problem areas or soak embers as they cool.
Always check your fire is completely out before leaving the area.
- Hose with a spray nozzle gives you more control.
- Keep at least five gallons of water ready for medium-sized fires.
For extra safety, always follow best fire pit placement ideas to minimize risk with your setup.
Heat-Resistant Gloves and Long Tools
Adding a pair of thick, heat-resistant gloves and a set of long-handled tongs or a fireplace shovel gives you better control and minimizes burns or accidental contact.
Move logs, shift embers, or stir ashes without getting too close.
- Choose gloves rated for at least 400°F.
- Look for sturdy, rustproof tools that are easy to clean.
Ash Bucket with Lid
An all-metal ash bucket with a tight-fitting lid lets you safely transport and dispose of hot ashes.
Never use plastic, which can melt or ignite if embers are still hot.
- Wait until ashes are cold before emptying in the trash.
- Store the bucket at least several feet from your house or deck.
Hardware Checklist: Quick Reference
To help you check your fire pit safety gear quickly, here’s a simple list you can run through before each use:
- ABC fire extinguisher (charged and accessible)
- Metal screen or snuffer lid
- 5-gallon bucket of water or garden hose
- Sand or dirt bucket
- Heat-resistant gloves and long-handled tools
- Metal ash bucket with lid
Make safety equipment a permanent part of your routine. For a helpful list of “emergency” gear, check out my article Backyard Fire Pit Safety 101.
Taking these simple steps each time you build a fire pays big dividends. With the right tools on hand, you’ll manage every aspect of how to put out a fire pit confidently and responsibly.
Special Considerations for Safe Fire Pit Use
Knowing how to put out a fire pit goes beyond having the right gear. Safety starts the moment you light your fire and continues even after you’ve poured water, stirred ashes, or secured your snuffer lid.
Paying attention to a few critical details can stop accidents before they start, keep everyone at ease, and make every backyard gathering stress-free.
Weather and Environmental Awareness
Always check the weather before starting or extinguishing your fire pit. Even a steady breeze can carry embers into dry grass or leaves, sparking a problem you don’t want.
Avoid using your fire pit during high winds, droughts, or when local fire warnings are in effect.
- Wind can make hot embers jump, spreading fire quickly.
- Low humidity increases the risk of flare-ups.
- Rain can soften the ground, making pits unstable, and sudden storms can scatter embers.
Local restrictions matter. Some areas ban fire pits during certain months or under specific weather conditions.
For peace of mind and legal safety, check with city or county authorities before each burn.
Safe Placement and Surroundings
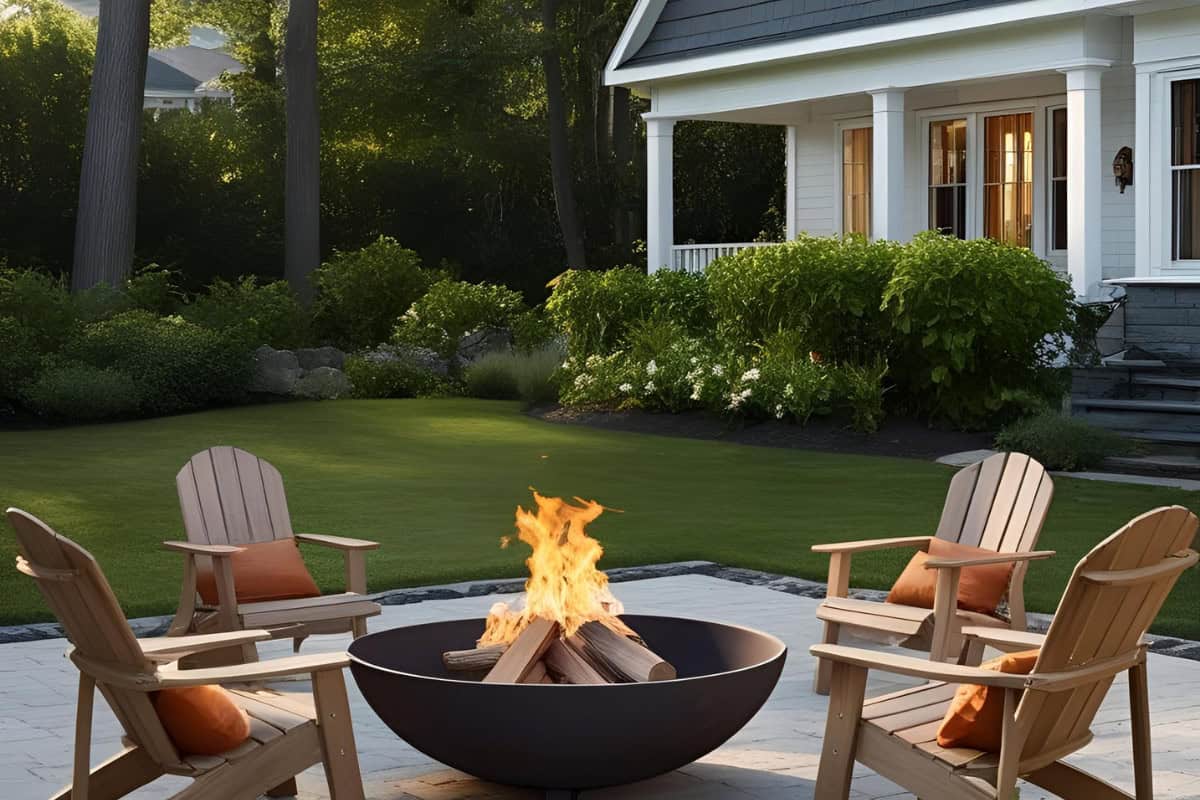
Where you place your fire pit makes all the difference in fire safety. Always set up on a level, non-flammable surface like gravel, concrete, or pavers—never directly on grass, a wooden deck, or beneath overhanging branches.
- Leave at least 10 feet between your fire pit and any structure or shrub.
- Keep the area clear of debris, dry leaves, and outdoor furniture.
- Watch out for low-hanging tree limbs that can ignite with a sudden burst of flame.
Some setups, such as fire pits on balconies or porches, need extra attention and may call for protective mats under and around the pit.
For tips and must-have safety gear for tighter outdoor spaces, visit Balcony Fire Pit Safety Tips.
Handling Fuel and Ignition Materials
Choosing and using firewood or fuel responsibly is key when thinking about how to put out a fire pit safely.
Only burn seasoned hardwood or fire pit-approved materials. Avoid trash, cardboard, pressure-treated lumber, or any fuel with chemicals that may create toxic smoke or stubborn, smoldering embers.
- Keep an extra stack of dry wood away from the pit so stray sparks don’t set it off.
- Store matches and lighters out of children’s reach, and never use gasoline or lighter fluid to start or revive a fire.
- Limit your fire’s size—keep it manageable so it’s easier to put out.
Monitoring and Supervision
Never leave your fire pit unattended. Adult supervision is non-negotiable while the fire is lit and during the cool-down period.
Supervise children and pets closely, teaching them to stay at least three feet away from the fire pit—all the way until it’s stone-cold.
- Assign one adult to watch over the fire each time.
- Make it a rule to double-check the ashes before calling it done for the night.
- Have sdafety equipment like a fire extinguisher or water bucket at arm’s length to react instantly if needed
Material-Specific Safety Tips
Not all fire pits are created the same. The safest options often feature design details like deep bowls, mesh screens, or built-in snuff lids.
- Metal pits withstand heat but can rust if exposed to water.
- Stone and concrete pits resist wind but may crack with rapid cooling.
- Propane or gas-powered pits have automatic shut-offs and fewer embers.
To learn which style fits your backyard and safety needs best, visit the complete guide on Best fire pit types for safety.
Paying attention to these simple but important details sets you up for a safer, more relaxing fire pit experience every time.
Consistency in safety habits will keep you, your guests, and your home out of harm’s way—while making every fire pit gathering memorable for the right reasons.

How to Maintain Your Fire Pit After Putting Out the Fire
Once you’ve followed the right steps for how to put out a fire pit, your responsibility doesn’t stop there.
Regular maintenance after each use will help your fire pit last longer, look better, and work more safely.
Cleaning up while the fire pit is still cool prevents rust, discourages critters, and keeps lingering odors out of your yard.
Let’s walk through the simple steps you should take every time you use your fire pit.
Clear Away Ashes and Debris
After your fire pit is completely cool, tackle the ashes and leftover debris. This task is more than a tidy-up—built-up ash can block air flow next time, hold moisture against metal, and even attract pests.
- Use a small metal shovel or scoop to remove ashes and burnt material.
- Place cooled ashes in a metal ash bucket with a lid.
- Store hot ashes away from buildings or flammable items until they’re fully cold.
Ashes contain reactive chemicals that can break down your fire pit’s materials over time. Try not to let them sit for days on end.
Check for Moisture or Rust
Inspect your fire pit inside and out for spots where water might have collected. Moisture, especially when combined with leftover ash, causes rust and weakens both metal and stone fire pits.
- Wipe down any damp surfaces with a dry rag.
- Use a hand broom to sweep cracks or crevices, especially if you have a brick or stone fire pit.
- Look closely for orange spotting—an early sign of rust.
If you spot rust, clean the area with a wire brush and apply a high-heat paint or a fire pit-safe sealant right away.
Clean Grates, Screens, and Tools
Parts like cooking grates, spark screens, and tongs get dirty quickly. Grease, ash, and soot can corrode parts sooner than you think if left unattended.
After each burn:
- Remove and scrub grates or screens with a wire brush.
- Wipe down tools with a damp, soapy cloth and dry thoroughly.
- Never stack damp tools or accessories inside your fire pit.
By keeping everything clean, you’ll make your next fire safer and more pleasant. Clean gear also burns more efficiently and won’t impart strange tastes if you cook over the flames.
Cover and Store Your Fire Pit
Protection from rain, snow, and morning dew adds years to even the hardiest fire pit models.
When you’re done for the night:
- Place a snug-fitting, weatherproof cover over the entire fire pit.
- For portable models, move them to a sheltered spot when not in use.
- Make sure no embers are still burning before covering.
Covers also block leaves, insects, and neighborhood critters from taking up residence in your fire pit.
Inspect for Structural Damage
After clean-up, take a moment to inspect the structure. Fast action on cracks, loose stones, or unstable legs saves you costly repairs and helps avoid safety risks later on.
- Check for loose bolts, stones, or warped metal.
- Tighten or replace screws and bolts as needed.
- Report major cracks or flaws to the manufacturer for advice or warranty claims.
Spotting and fixing damage early will reduce your risk the next time you fire up your backyard retreat.
Ready Your Fire Pit for the Next Burn
A little extra attention after each use pays off when it’s time to light your next fire. By handling ashes, preventing moisture, and securing a tight cover, you set yourself up for hassle-free fires all season long.
Don’t forget, proper maintenance head-to-toe—from the base to your fire pit tools—reflects good fire pit ownership and brings peace of mind every time you light a match.
For those looking for more expert care hacks, you’ll find plenty of inspiration among other fire pit best practices and add-ons.
Taking the time now means less work and more backyard fun later.

FAQs: How to Put Out a Fire Pit
No, it is not safe to leave a fire pit smoldering overnight. Even a seemingly extinguished fire can retain enough heat to reignite under the right conditions, posing serious risks of property damage, wildfires, and carbon monoxide poisoning.
Properly extinguishing a fire pit requires thoroughly dousing all embers with water, stirring the ashes to expose hidden hot spots, and continuing to add water until no steam or hissing sounds are produced.
Fire safety experts strongly recommend completely extinguishing outdoor fires when unattended, as wind can easily blow embers onto nearby flammable materials, potentially causing devastating wildfires or structure fires.
Additionally, smoldering fires produce carbon monoxide, which can be particularly dangerous when located near open windows or doors where the gas might drift indoors.
For those concerned with convenience, investing in a propane or natural gas fire pit with controlled shut-off capabilities offers a safer alternative that eliminates the risk of lingering embers.
Once you’ve fully extinguished your fire pit, wait until the ashes have completely cooled before handling them—typically at least 24 hours.
Store the cooled ashes in a metal container with a tight-fitting lid, never using plastic, paper, or cardboard containers which could ignite from lingering hot spots.
Garden enthusiasts can repurpose wood ashes as a valuable soil amendment since they contain potassium, calcium, and other nutrients beneficial for plants, though they should be used sparingly on alkaline soils as they can raise pH levels.
For disposal, check your local regulations as options vary by location—some municipalities allow ashes in regular trash once completely cooled, while others have specific collection services for fire residue.
During disposal, be mindful of wind conditions to prevent ash from blowing into unwanted areas, and never dump ashes in natural areas where they could harm local ecosystems or potentially reignite.
Finally, keep fire pit ashes away from structures, vegetation, and flammable materials until you’re absolutely certain they contain no remaining heat.
Hardwoods like oak, hickory, and maple are widely considered the best burning firewood choices for fire pits due to their dense composition, which creates longer-lasting fires with consistent heat output and minimal smoke production.
Oak stands out as particularly excellent because it burns slowly and steadily for hours while creating robust coals that maintain warmth throughout the evening.
Maple offers a pleasant, subtle aroma while burning cleanly with moderate heat, making it ideal for cooking or when guests are gathered around the fire.
Hickory generates intense heat and imparts a distinctive smoky flavor that enhances cooking experiences, though it should be well-seasoned for at least 12 months before use to reduce excess smoke.
Cherry, apple, and other fruitwoods provide sweet aromas and moderate heat output, creating an inviting atmosphere with decorative flames, though they typically don’t last as long as denser hardwoods.
Regardless of wood type, always ensure your firewood has been properly seasoned (dried) for at least 6-12 months until it reaches 20% moisture content or less—identifiable by checking for cracks at the ends, a hollow sound when pieces are knocked together, and bark that easily peels away—as this significantly reduces smoke, improves burning efficiency, and minimizes harmful creosote buildup in the fire pit.
Wrap-up: How to Put Out a Fire Pit
Practicing the right steps for how to put out a fire pit protects everyone and keeps your outdoor space safe.
Taking time to double-check for hidden embers and cleaning up properly prevents dangerous surprises or costly damage.
Your decisions matter every time you use a fire pit. Build on this knowledge to help protect your home and encourage others to do the same.
Ready to improve your entire backyard routine? Review essential fire pit basics at Starting a Fire Pit Guide.
Your attention to safety shapes memorable nights and keeps your backyard welcoming for seasons ahead.


