
Starting a fire pit sounds simple until you’re out there with damp wood and matches that won’t catch.
Knowing how to start a fire pit the right way means less frustration, more warmth, and safer evenings outdoors.
Many people struggle to start a fire pit because of the wrong firewood, poor setup, or skipped safety steps.
This post breaks down everything you need to start a fire pit, from the best types of tinder and kindling to proven stacking methods that actually work.
You’ll find step-by-step instructions, safety reminders, and mistakes to avoid whether you’ve just bought a new fire pit or you’re tired of smoke and endless relighting.
Along the way, you’ll get answers to common questions like what to use to start a fire pit and why firewood quality matters.
Mastering the best way to start a fire pit will save you time and money. You’ll enjoy better flames, less smoke, and safer nights.
Get ready—lighting up your next backyard gathering is about to get a lot easier.

Gather What You Need: Fire Pit Fuel and Tools
Starting a fire in a fire pit should feel simple and stress-free. If you want fewer failed attempts and less smoke, the right materials matter.
Preparation is key: with proper fire pit fuel and the right tools, you’ll light a fire pit easily and enjoy longer-lasting warmth.
Let’s break down the basics—starting with the materials you’ll actually put in your fire pit.
Choosing the Right Tinder and Kindling
Tinder and kindling are your fire’s jump-start. Without them, getting logs to ignite feels like an uphill battle.
Good tinder catches a spark or flame fast, while kindling bridges the gap to your main firewood.
Start with tinder. You can use items from around your home or special fire pit starter products.
Great options from home include:
- Dryer lint (natural fiber only)
- Shredded newspaper (avoid glossy magazine pages)
- Cotton balls dipped in petroleum jelly
- Small wood shavings
Outdoor stores also sell reliable fire pit starters.
Pre-made options include:
- Wax-coated wood chips
- Fatwood sticks
- Fire starter cubes or squares
- Stormproof matches
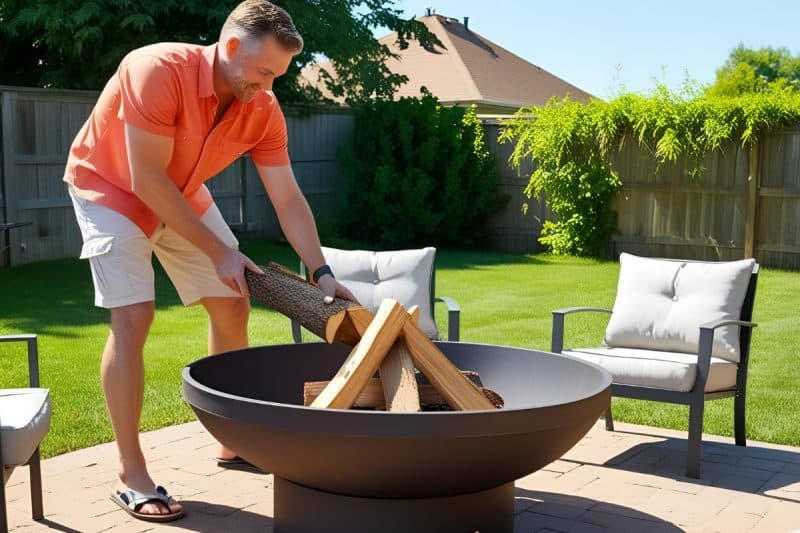
For an easy way to start a fire in a fire pit, stack your tinder loosely at the center. Add a layer of kindling—thin, dry sticks or wood split to finger thickness—over the tinder.
Think of tinder as the spark, kindling as the tinder’s muscle. Make sure kindling is dry; damp sticks will frustrate your efforts.
Want expert-rated picks? Check out this roundup of the 10 best fire starters for fire pits and more so you have confidence in what you use to start a fire pit.
Selecting Seasoned or Kiln-Dried Firewood
The best way to start a fire pit is with firewood that’s ready to burn. Choose seasoned (air-dried for 6-12 months) or kiln-dried (baked to remove moisture) logs.
Unlike fresh wood, these produce steady heat and far less smoke. Wet or “green” wood will spit and fizzle, leaving you with more smoke than flame.
You can spot seasoned wood with a quick look:
- Ends appear gray, cracked, and feel light
- Wood sounds hollow when tapped
- Bark peels easily
- No fresh, green smell
Kiln-dried wood takes things further—moisture levels are lower, almost every log lights on the first try.
If you want to know more about firewood choices and how to get consistent, warm fires, see our guide on the best firewood for fire pits.
Using seasoned or kiln-dried logs not only makes it easier to start a fire pit fire but also means less smoke for everyone sitting nearby.
Dry wood lets your tinder and kindling do their best work, turning a spark into a full, crackling fire.

Step-by-Step Method: Start a Fire Pit Fire Safely and Easily
Once you have your tinder, kindling, and seasoned firewood ready, the next step is learning the best way to start a fire pit.
A good setup will mean quick lighting, less smoke, and a safer experience for everyone outdoors.
How you arrange your wood in the fire pit affects everything—from airflow, to how easy it is to light a fire pit, to how well the flames spread.
Let’s walk you through the basics for success.
Arranging Tinder, Kindling, and Firewood for Proper Airflow
Airflow is the secret that separates a smoldering pile from a full, crackling fire. When you stack your materials correctly, oxygen flows easily, feeding the flames from the first spark.
Three simple setups work best in most fire pits:
1. Teepee Method
- Stack small pieces of kindling over your tinder in a cone shape.
- Place the tinder in the center.
- Lean the kindling sticks together so air can move between.
- Add larger firewood as the flames grow.
2. Log Cabin Method
- Lay two pieces of firewood parallel, a few inches apart.
- Stack two more on top, but at a right angle, forming a square.
- Place tinder and kindling in the center “cabin.”
- Each layer lets plenty of air through.
3. Pyramid Method
- Layer kindling and small firewood in a pyramid over the tinder.
- Each level gets smaller as you build upward.
- Leave gaps for air and flames.
Key tip: Never cram wood too tightly. Crowded logs and sticks block air, making it difficult to start a fire pit. Always leave small gaps between tinder, kindling, and logs. This helps the fire breathe and build faster.
Lighting the Fire: Best Starters for Wind and Wet Conditions
The tool you choose to light a fire pit truly matters. The weather, your skill, and even the type of wood can affect what to use to start a fire pit on the first try.
Here’s what you need to know:
- Matches: Cheap and easy to find, but blow out fast if it’s windy or damp.
- Lighters (classic butane or long-reach grill lighters): Great for most days, safe for reaching into the pit. Struggle in strong wind.
- Electric or plasma arc lighters: Rechargeable, windproof, and reliable. No need for fuel refills.
- Torch lighters: Like mini blowtorches, these burn hot and light wood even if it’s damp. Use care—they get very hot, very fast.
- Weatherproof fire starters: Some modern fire pit starter cubes or gels burn even in rain or wind, letting you start a fire pit fire in tough conditions.
Pro tip: If you light a fire pit often in wet or windy weather, look for tested products like Pyro Putty or Black Beard Fire Starters.
These burn strong even when the conditions are rough, as confirmed by outdoor reviewers in the Best Fire Starters of 2025, Tested and Reviewed roundup.
With the right setup and a quality fire pit starter, lighting up your night becomes a breeze.

Tips to Keep the Fire Pit Burning Strong and Safe
A roaring fire pit is the heart of any backyard hangout, but keeping those flames steady can take practice.
Once you start a fire pit, you want a fire that doesn’t sputter, fizzle out, or smoke up the night.
Staying safe while making your fire burn strong and bright is just as important as getting it started in the first place.
Let’s break down the best ways to keep your wood burning fire pit going, plus practical tips for what to do when things just won’t catch.
Troubleshooting: What To Do If Your Fire Pit Won’t Light
Starting a fire in a fire pit can feel like a struggle when nothing wants to catch. Knowing the common reasons your fire pit won’t light will save you frustration—and wasted matches.
Here’s what could be going wrong and how to fix it next time.
Main reasons fires don’t start easily:
- Damp Wood: Wet logs or even a few damp pieces can block the flames. Moisture in your firewood slows everything down and makes smoke instead of a steady fire.
- Poor Fire Structure: Overpacked wood with no airflow or a loose pile that collapses smothers potential. Fire needs room to breathe; the way you stack matters.
- Wind Blowing Out Flames: Gusty winds snuff out tinder quickly. Windy nights mean matches don’t stay lit and starters get scattered.
- Weak Tinder or Kindling: Old, damp, or insufficient tinder and kindling won’t hold a flame long enough to ignite the main logs.
How to fix and prevent these issues:
- Double-check your wood: Always use seasoned or kiln-dried firewood. Store your logs off the ground and covered by a tarp or in a sheltered rack.
- Rebuild your fire structure: Use easy stacking methods like the teepee or log cabin. Fresh kindling on the bottom, bigger pieces up top. Leave an open pocket for air to move through.
- Shield your fire pit from wind: Light a fire pit with your back to the wind, or set up a simple windbreak using outdoor chairs or a panel.
- Pick the right fire pit starter: Up your starter game. Stock up on trusted options like cotton balls with petroleum jelly, wax-coated sticks, or highly rated fire pit starter cubes for reliable ignition.
- Keep matches and lighters dry: Store them in sealed bags or waterproof boxes. For wet conditions, try a weatherproof fire starter—these burn hot and won’t go out easily even in the rain, as shown in the best fire starter tests for 2025.
Take a step back if your fire won’t start. Re-stack, swap out damp wood, or grab a better starter to light a fire pit fast. Most problems have simple solutions.
Consistent success is about good fuel, proper setup, and a bit of wind awareness.
So, when you know what to use to start a fire pit and keep it burning, your evenings become easy and enjoyable, not a series of failed attempts.

Putting Out the Fire Pit and What to Do With Ashes
Once you’ve enjoyed the warmth and glow, the next step is putting out your fire pit safely. Many new fire pit owners focus on how to start a fire pit but overlook the right way to end the night.
Proper extinguishing steps protect your backyard, keep kids and pets safe, and make cleanup simple.
After putting the fire out, don’t ignore the ashes—how you handle them impacts your safety, your yard, and even your garden.
Steps to Put Out a Fire Pit Safely
As your wood fire pit burns down, stop adding logs and let the flames die back on their own. This gradual approach helps the main fire pit fuel burn off, so only glowing embers remain.
Once most of the flames are gone, use a safe method to extinguish the embers:
- Smother with Sand or Dirt: Scoop dry sand or dirt onto the embers. This snuffs out pockets of heat and blocks oxygen.
- Soak with Water: Pour a steady stream of water over the ashes and embers, avoiding a fast gush that could splash hot ash. Listen for the hiss—this means you’re hitting hot spots. Stir with a shovel or metal stick to expose hidden embers.
- Mix and Check: Stir the ashes around. Look for any glowing spots. Add more sand or water if needed.
Don’t rush to clean out the pit—ashes can stay hot for hours. Check again before letting pets or kids near the area, and avoid dumping water too quickly to prevent cracking a metal or stone fire bowl.
For extra peace of mind, a metal fire pit cover can keep embers contained overnight, as fire safety guides suggest in the full list of tips for putting out a fire pit.
Safe Ash Disposal After You Start a Fire Pit
Handling cooled ashes the right way matters. Hot ash can hide embers that burn through bags and cans.
Follow these steps for safe and simple fire pit ash disposal:
- Allow ashes to cool completely. This often takes 24–48 hours or longer depending on the weather.
- Use a metal scoop to transfer ashes to a metal container with a tight lid.
- Keep your container on a non-combustible surface while the ashes finish cooling.
Once ashes are cold, you can add them to your household trash. Make sure there are no warm spots left.
Never dump warm ashes in plastic bins or compost—safety should always come first after starting a fire in a fire pit.
If you want to get more from your wood fire pit, consider ways to recycle ashes:
- Sprinkle ash on icy driveways for traction in winter.
- Add small amounts to garden soil. Ash from clean, untreated wood can improve pH and add nutrients for some plants like tomatoes and broccoli.
For more details on ash safety and smart disposal, look for expert advice like these tips for extinguishing and handling ashes in metal fire pits.
Fire Pit Safety Reminders
Don’t forget about safety even after the flames are out.
Always:
- Keep children and pets away from cooling fire pits.
- Store leftover ash in a safe place until fully cooled.
- Have a shovel, bucket of sand, and water source ready before you start a fire pit.
Knowing how to start a fire pit fire is only half the process. Ending your backyard fire safely ensures the kind of peace of mind you want after a great night outdoors.
For more comprehensive safety tips and the best fire pit accessories, check out the guide to must-have fire pit safety gear and tools.

Wrap-up: How to Start a Fire Pit
Starting a fire in a fire pit gets easier the more you practice. Keep safety items close every time—gloves, tongs, and water should always be part of your fire kit.
With each session, you’ll find the best way to start a fire pit that works for your style and setup.
Stock up on quality tinder, kindling, and seasoned firewood so you’re always ready to light a fire pit for friends or family. Safe fire pit habits grow over time.
Stay mindful of your surroundings and fire pit placement. For more safety advice before your next session, visit our Fire Pit Safety Guidelines post.
Curious about placement, accessories, or fire pit care? Explore our full library for detailed tips and guides.
Thanks for joining in—share your fire pit wins and lessons to help others start a fire pit fire with confidence.

FAQs: How to Start a Fire Pit
A properly maintained wood fire pit typically reaches temperatures between 800-1200°F (427-649°C) at its core, with surface temperatures of the surrounding fire pit structure ranging from 400-600°F (204-316°C) depending on construction materials and design.
These intense temperatures require careful consideration of your fire pit’s placement, as radiant heat can damage nearby materials even without direct flame contact.
Most combustible materials like furniture, vegetation, etc. should be kept at least 10-15 feet away from your fire pit’s edge.
Stone, brick, and concrete surfaces can withstand proximity better but may still experience thermal stress over time.
When choosing a permanent location for your fire pit, remember that prolonged exposure to these temperatures can cause cracking in concrete patios, discoloration of nearby stone features, and potentially dangerous heat transfer through the ground if the fire pit lacks proper thermal barriers beneath it.
Always place portable fire pits on heat-resistant surfaces and use protective mats under fire pits placed on wooden decks or sensitive surfaces.
Weather conditions significantly impact fire pit performance, requiring specific adjustments to maintain an enjoyable experience.
During high humidity or after rainfall, wood moisture content increases even in stored firewood, making ignition more difficult and producing more smoke.
Combat this by using extra tinder and kindling, selecting your driest wood reserves, and potentially employing commercial fire starters designed for damp conditions.
Wind presents particular challenges, not only by rapidly accelerating fire spread in unsafe directions but also by creating erratic flame patterns and increasing ember projection.
When dealing with windy conditions, position your seating upwind of the fire pit to avoid smoke, build a lower, more contained fire structure, and consider using a fire screen for added safety against flying embers.
Temperature extremes also affect your fire’s performance—cold weather pulls heat upward more quickly, requiring more frequent addition of fuel, while hot weather may make maintaining comfortable seating distances challenging.
During seasonal transitions, be particularly mindful of surrounding vegetation that may have become drier and more combustible, increasing clearance distances accordingly.
Regular fire pit use has several environmental considerations that conscious owners should address to minimize negative impacts.
Wood smoke contains particulate matter and compounds that contribute to air pollution, with older fire pits and improper burning techniques producing significantly higher emissions.
To reduce your environmental footprint, invest in a more efficient, modern fire pit design with better airflow management or consider a natural gas or propane alternative that produces virtually no particulate emissions.
When using wood, burn only properly seasoned hardwoods free from chemicals, paint, or manufactured wood products that release toxins when burned.
Implement a sustainable wood sourcing strategy by purchasing from certified suppliers who practice responsible forestry management or using fallen timber from your property rather than cutting live trees.
The ash produced requires proper disposal—never dump it in waterways where it can alter pH levels and harm aquatic life.
Instead, allow ash to cool completely for 48-72 hours, then incorporate small amounts into compost (neutralizing its alkalinity with acidic materials) or dispose according to local regulations.
For those in areas prone to air quality issues or drought, consider limiting fire pit use during high pollution advisory days or fire restrictions to be a good environmental steward.