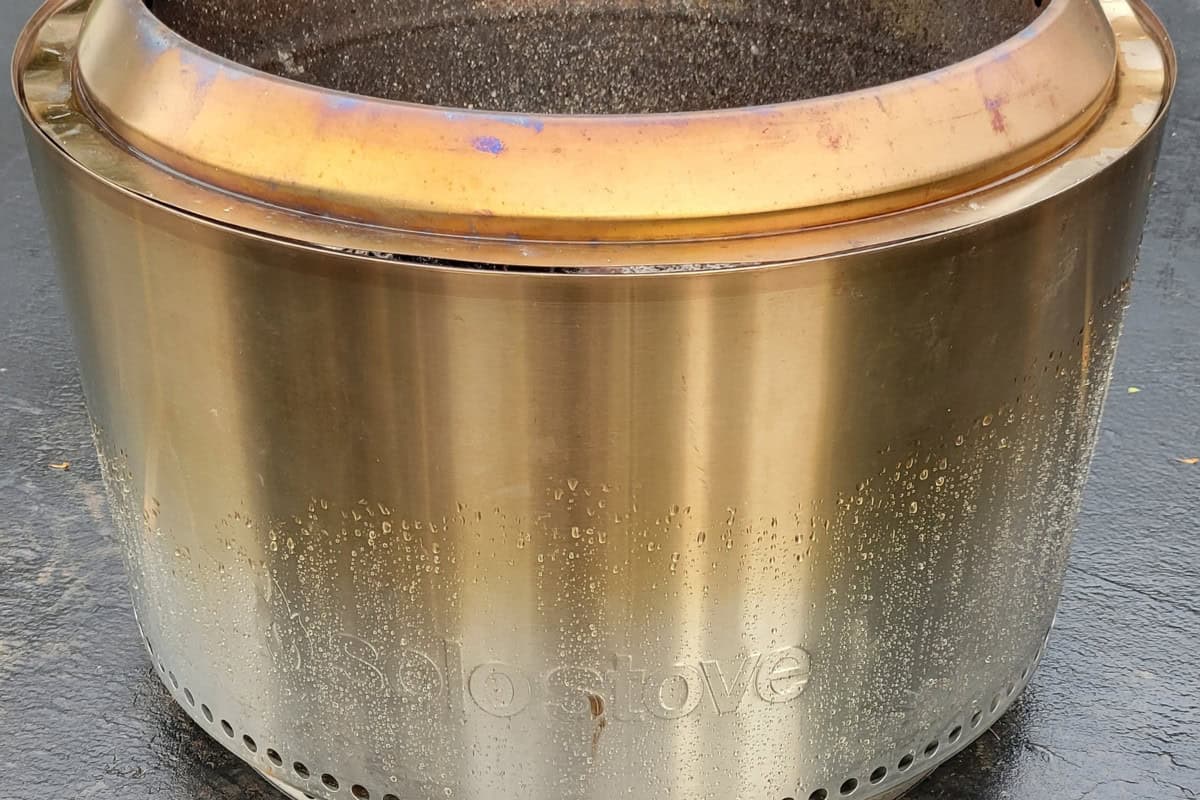
If your Solo Stove got rained on, you should act within the next 24 hours to prevent permanent rust damage. Every Solo Stove owner faces this emergency eventually—whether from an unexpected storm, forgotten cover, or sprinkler mishap.
Good news: Your fire pit isn’t ruined. With the right cleanup process, you’ll have it looking pristine again in under 3 hours. The bad news? That wet ash-water slurry gets a little harder to remove every hour you wait, and rust can start forming in as little as 48 hours on heat-stressed stainless steel.
This guide provides model-specific cleanup instructions for every Solo Stove size—from the compact Ranger to the massive Canyon. Jump directly to your 5-step emergency cleanup process below, or keep reading to understand why immediate action saves you from costly damage.
Key Takeaways
- Act quickly within 24 hours if your Solo Stove got rained on to prevent permanent rust damage.
- Follow our 5-step emergency cleanup guide, tailored for different Solo Stove models, to restore your fire pit.
- Immediate action helps prevent micro-rust formations from forming due to prolonged water contact on heat-stressed steel.
- Use proper covers, strategic placement, and quick-drain surfaces to prevent future water damage.
- Regular maintenance and quick-response practices are essential to prolong the lifespan of your Solo Stove.
- How to Clean Solo Stove After Rain: Complete "Emergency" Guide
- Understanding Solo Stove Rain Damage Science
- Model-Specific Rain Vulnerability Analysis
- How to Prevent Solo Stove Water Damage
- Comprehensive Rain Protection Strategies
- Long-Term Maintenance and Rust Prevention
- Emergency Rain Response Strategies
- Solo Stove Model Comparison for Rain Resilience
- Wrap-up: Your Solo Stove Got Rained On
- FAQs: Wrap-up: Your Solo Stove Got Rained On
How to Clean Solo Stove After Rain: Complete “Emergency” Guide
Learning what to do when your Solo Stove got rained on can mean the difference between a minor 10-minute cleanup and costly permanent damage.
The process varies by model, but these universal principles apply to every Solo Stove.
Learning how to clean Solo Stove after rain properly can mean the difference between a 10-minute inconvenience and permanent damage.
The process varies by model, but these general principles apply to every Solo Stove that gets wet.
Solo Stove Rain Cleanup Process
The post-rain cleanup process requires systematic action to prevent future problems with your Solo Stove.
Below you’ll find our comprehensive 5-step visual guide that walks you through everything needed to restore your fire pit.
This guide covers both original Solo Stove models (with fixed bottoms) and newer 2.0 versions (with removable ash pans and base plates), as the cleanup approach differs a bit between generations.
Emergency Solo Stove Rain Cleanup Process
Systematic approach to prevent rust damage and restore your fire pit
First: Identify Your Solo Stove Model
The cleanup process varies depending on whether you have an original Solo Stove or a newer 2.0 model with removable components.
Original Solo Stove Models
These models have a fixed bottom with vented holes but no removable base plate or ash pan. Models include original Ranger, Bonfire, and Yukon (pre-2.0).
Solo Stove 2.0 Models
These newer models feature a removable base plate and detachable ash pan for easier cleaning. Look for the removable components at the bottom of your fire pit.
What You’ll Need (Both Model Types)
Supplies Required
- Old rags or towels
- Paper towels
- Old nylon tarp (original models)
- Bar Keepers Friend cleaner
- Stainless steel polish (Weiman’s)
- Clean, grit-free towels
- Mild dish soap (2.0 models)
Tools Needed
- Work gloves (recommended)
- Helper for Yukon models
- Flat surface for draining
- Well-ventilated drying area
- Sink or basin (2.0 models)
Original Solo Stove Models
5-Step Process for Models Without Removable Base Plate
Remove Water-Soaked Debris Immediately
- Remove and dispose of all wet unburned firewood from the fire pit
- Focus on the interior bottom where ash collects around the inside perimeter
- Use your hands to scoop out the bulk of the soggy ash-water mixture
- Clear the seam running around the bottom edge using your index finger
- Don’t worry about perfection – just get the bulk debris out
Drain Your Solo Stove Completely
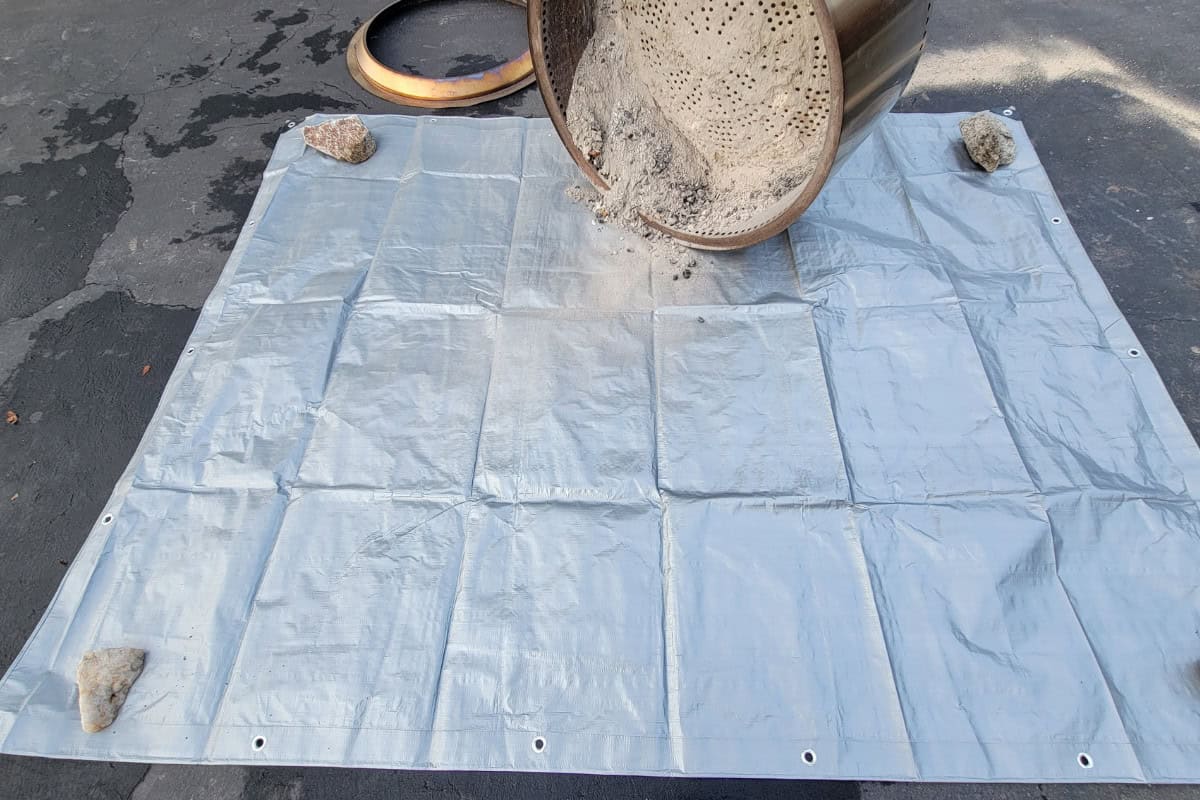
- Carefully turn over your Solo Stove to allow drainage
- For Yukon owners: get someone to help due to weight and size
- Place an old nylon tarp underneath to catch spillage
- Gently tap the bottom with your fist to dislodge stuck debris
- Leave inverted for about one hour for complete drainage
- Turn back to normal position when drainage is complete
Wipe Down All Surfaces Thoroughly
- Wipe down the entire inner portion with an old rag or towel
- Pay special attention to the flame ring and interior walls
- Use balled-up paper towels to dab up remaining moisture
- Wipe down the exterior with a clean, dry, grit-free towel
- Avoid abrasive materials that could scratch stainless steel
Ensure Complete Drying Before Use
- Set aside in a dry covered location with decent airflow
- Wait at least 24 hours if not planning immediate use
- Consider starting a small fire to evaporate remaining moisture
- Check all crevices and joints for trapped water
- Ensure double-wall design areas are completely dry
Clean and Protect the Exterior
- Apply Bar Keepers Friend according to package directions
- Focus on the top and sides of the exterior
- Follow up with stainless steel polish like Weiman’s
- Work in the direction of the steel grain for best results
- Apply protective coating to prevent future water spots
Solo Stove 2.0 Models
4-Step Process for Models With Removable Base Plate & Ash Pan
Remove and Clean Detachable Components
- Remove all wet firewood and debris from the main fire pit body
- Carefully lift out the removable base plate
- Remove the detachable ash pan from underneath
- Empty ash pan contents into appropriate disposal container
- Take components to sink or cleaning area for thorough washing
Clean Main Body and Components
- Wipe down main fire pit body interior with old rags
- Clean flame ring and air flow channels thoroughly
- Wash ash pan with warm soapy water and rinse completely
- Scrub base plate to remove ash buildup and debris
- Dry all components with clean towels
Ensure Complete Drying of All Parts
- Place all components in well-ventilated area to air dry
- Allow at least 2-4 hours for complete moisture evaporation
- Check that no water remains in crevices or joint areas
- Wipe down exterior surfaces of main body while waiting
- Ensure ash pan is completely dry before reinstalling
Reassemble and Protect Exterior
- Reinstall ash pan in correct position underneath
- Place base plate back into main body, ensuring proper fit
- Clean exterior with Bar Keepers Friend following package directions
- Apply stainless steel polish like Weiman’s for protection
- Work polish in direction of steel grain for best results
Need Expert Advice?
For specific questions and concerns about your Solo Stove getting rained on, consult with your local and online fire pit retail professionals. They can provide personalized guidance based on your specific model and situation.
Now that you understand the essential cleanup procedures, let’s explore comprehensive strategies for Solo Stove rain damage prevention and long-term protection.
The following information will help you prevent future situations where your Solo Stove got rained on and maintain your fire pit’s performance for years to come.
Understanding Solo Stove Rain Damage Science
When your Solo Stove got rained on, it doesn’t just create a cleaning inconvenience – it actively accelerates the deterioration of your Solo Stove’s protective properties.
Understanding this process helps you appreciate why quick action matters so much and prevents extensive damage from developing.
The Heat-Stress Factor
Heat exposure gradually reduces your Solo Stove’s natural rust resistance. When high temperatures repeatedly stress the stainless steel, chemical changes occur at the molecular level.
These changes make the metal vulnerable to moisture damage over time, especially when your Solo Stove got rained on repeatedly.
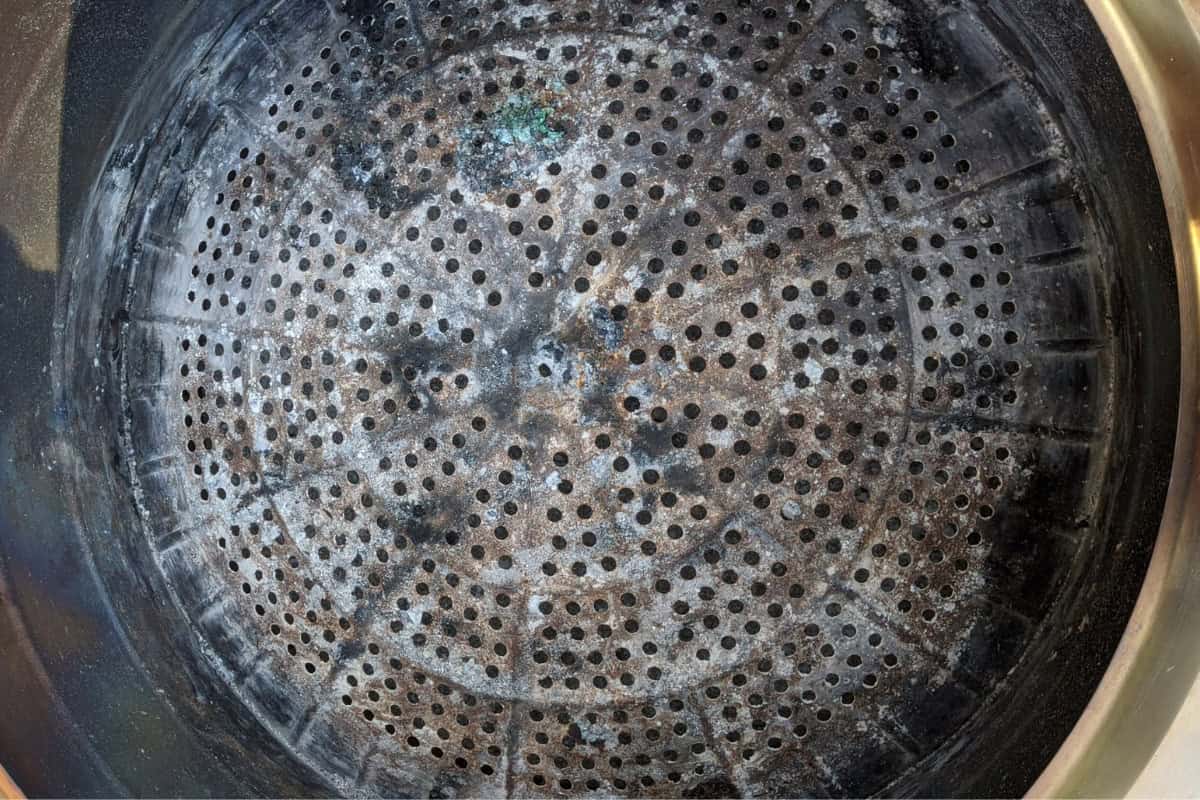
Stainless steel rust Solo Stove cases remain rare but follow predictable patterns. The rust typically begins where the protective chromium layer has been compromised by extreme heat—usually starting as small orange spots near the flame ring or air intake holes.
Unlike surface discoloration (which is normal), actual rust feels rough to the touch and continues spreading if left untreated.
304 stainless steel loses its chromium oxide protective layer when subjected to extreme temperature cycles.
This invisible barrier normally prevents fire pit rust formation, but heat stress compromises its effectiveness.
Rain accelerates this deterioration process significantly. The combination of compromised steel and direct water exposure creates perfect rust conditions.
Interior surfaces suffer the most damage because they experience the highest temperatures during use.
Proper 304 stainless steel fire pit care becomes critical after rain exposure. This premium steel grade resists rust naturally, but repeated wet-dry cycles without proper maintenance compromise its chromium oxide barrier.
Why Immediate Action Matters
Professional fire pit maintenance experts recommend immediate action after rain exposure. The longer water sits in contact with heated steel, the damage occurs.
This isn’t just about convenience – it’s about preventing permanent deterioration.
Water that remains in contact with stressed steel for than 24 hours begins creating micro-rust formations.
These tiny rust spots spread rapidly once established, making them much harder to treat effectively.
The ash-water mixture creates particularly aggressive conditions. Wet ash becomes slightly alkaline, which accelerates the corrosion process beyond what plain water would cause.
Model-Specific Rain Vulnerability Analysis
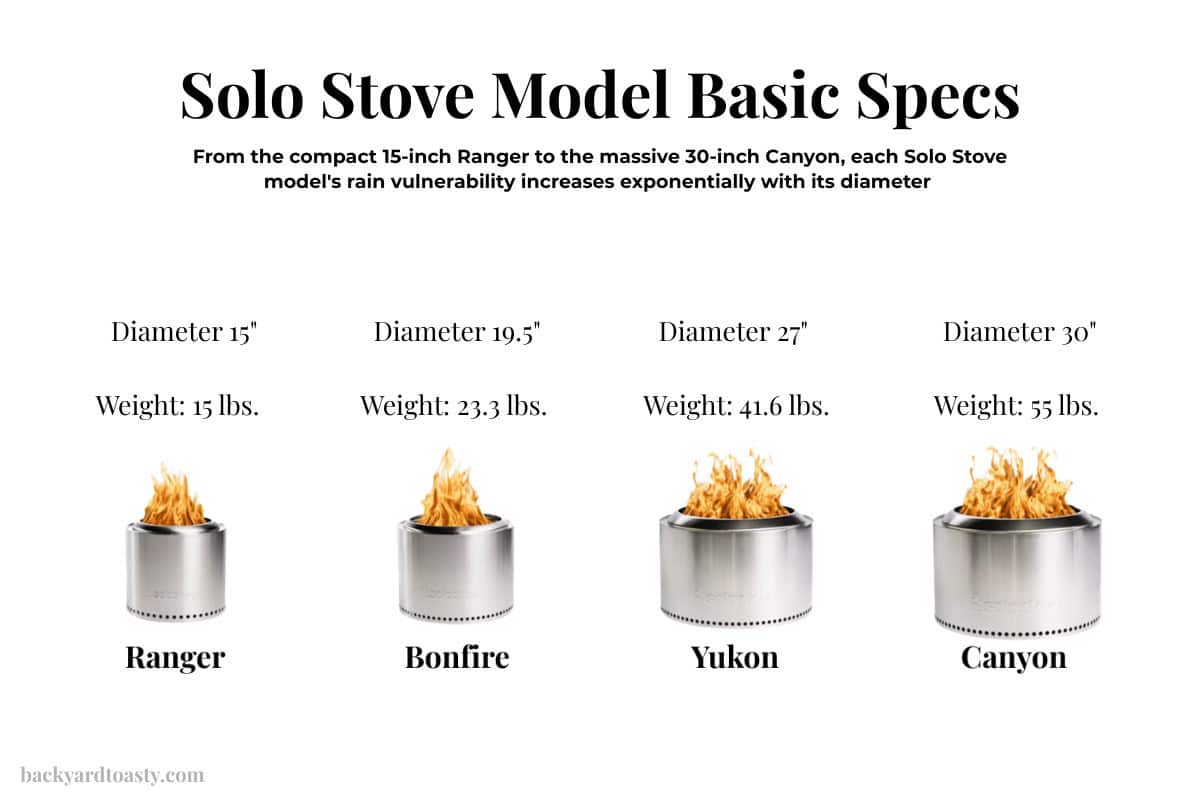
Understanding your model’s specific vulnerabilities helps distinguish between harmless Solo Stove discoloration and actual damage. While the rainbow-like heat patina is normal and even desirable, rust spots from rain damage require immediate attention.
Let’s examine how each model handles rain exposure:
Solo Stove Ranger Rain Performance (15″ Diameter)
Ranger models demonstrate the best rain resistance characteristics across the Solo Stove lineup. Even when your Solo Stove got rained on overnight, the compact design provides several advantages that larger models lack.
Minimal Water Collection: The 15-inch diameter opening collects only about 0.8 gallons during a 1-inch rainfall. This reduced volume makes both cleanup and drying significantly easier.
Weight Management: Even when fully loaded with rainwater, Rangers remain manageable for single-person cleanup. The reduced weight eliminates many safety concerns associated with larger models.
Faster Drying Times: The smaller internal volume and reduced thermal mass mean Rangers dry quickly than larger models. This reduces the window of vulnerability for rust formation.
Component Accessibility: Ranger 2.0 models offer the most user-friendly cleanup experience thanks to smaller, lighter removable components that are easy to handle and clean.
Solo Stove Bonfire Rain Challenges (19.5″ Diameter)
The Bonfire represents Solo Stove’s most popular model in both original and 2.0 versions. When your Solo Stove got rained on, its moderate size creates a sweet spot for rain collection – large enough to gather substantial water, but manageable enough for most people to handle cleanup.
Surface Area Considerations: The 19.5-inch diameter opening collects approximately 2.1 square feet of rainfall. During a typical storm (1 inch of rain), your Bonfire collects nearly 1.3 gallons of water. This substantial volume explains why proper drainage becomes so critical.
Original Bonfire Specific Issues: The fixed bottom design means all collected water settles in the hidden ash pan area. Without removable components, accessing this trapped water requires the complete inversion process detailed in the cleanup guide.
Bonfire 2.0 Advantages: The removable ash pan eliminates the most problematic aspect when your Solo Stove got rained on. However, the large interior volume still requires thorough drying to prevent moisture retention in the double-wall design.
Solo Stove Yukon Rain Complications (27″ Diameter)
Yukon models face severe rain challenges due to their large surface area and weight. When your Solo Stove got rained on heavily, the 27-inch diameter creates significant problems that smaller models don’t experience.
Water Collection Volume: The Yukon’s 4.0 square feet of opening collects approximately 2.5 gallons during a 1-inch rainfall. This massive water volume creates serious weight distribution issues during cleanup.
Physical Handling Challenges: Original Yukon models can weigh over 100 pounds when filled with rainwater and wet ash. The cleanup process becomes a two-person job for safety reasons, especially when inverting the unit for drainage.
Heat Retention Issues: The large thermal mass means Yukons retain heat longer than smaller models. This extended heat exposure period makes the steel vulnerable to rain damage if storms arrive before complete cooling.
2.0 Model Improvements: Yukon 2.0 models still require careful handling due to component size, but eliminating the inversion requirement makes cleanup significantly safer.
Solo Stove Canyon Rain Management (30″ Diameter)
The Canyon represents the ultimate challenge when your Solo Stove got rained on due to its massive 30-inch diameter. Originally known as the “Yukon 30,” this largest model in the Solo Stove lineup requires the most preparation and effort for rain recovery.
Maximum Water Collection: The Canyon’s 4.9 square feet of opening collects approximately 3.1 gallons during a 1-inch rainfall. This enormous water volume makes it the most challenging model for post-rain cleanup.
Extreme Physical Demands: Original Canyon models filled with rainwater and wet ash can exceed 120 pounds, making them impossible for single-person cleanup. The cleanup process absolutely requires multiple people for safe handling, especially during the inversion process.
Extended Cooling Requirements: The Canyon’s massive thermal mass retains heat longer than any other Solo Stove model. This extended cooling period increases vulnerability to rain damage if storms arrive before the fire pit reaches safe handling temperatures.
Canyon 2.0 Advantages: While Canyon 2.0 models eliminate the dangerous inversion requirement, the removable components are still substantially larger and heavier than other models. Multiple people may still be needed for safe component handling during cleanup.
How to Prevent Solo Stove Water Damage
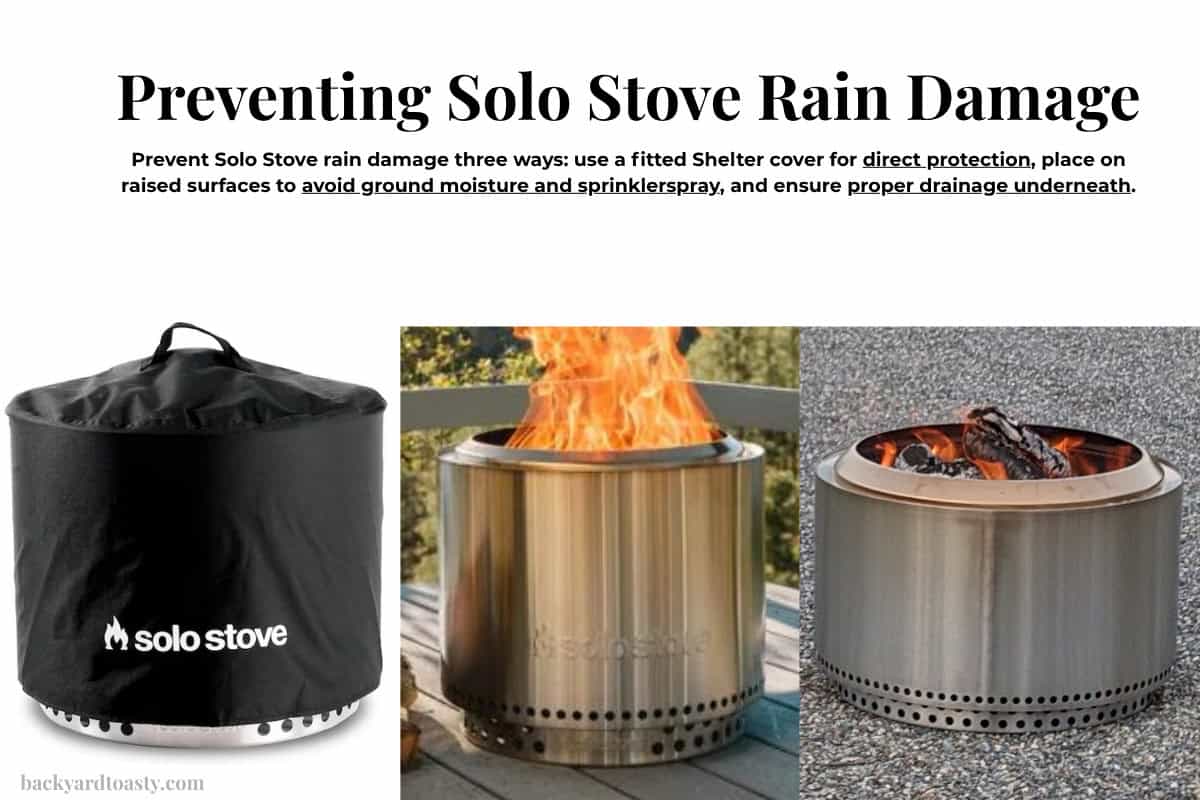
Smart owners prevent Solo Stove water damage (usually from rain) through multiple defense layers.
While we’ve covered emergency cleanup, prevention remains your best strategy:
First Line Defense: Quality Covers Used Religiously
Your Solo Stove’s primary protection comes from a proper, well-fitted cover. The official Solo Stove cover offers precise dimensions and waterproof materials specifically designed for your model.
Third-party options can work but verify waterproofing, UV protection, and exact fit before purchasing.
Consistency is key—develop the habit of covering your stove immediately after cooling (typically 30-60 minutes after your final ember dies out).
Even a light dew can begin oxidation processes that damage your stove over time. During rainy seasons, consider using bungee cords to secure covers against wind.
Pro tip: Check your cover monthly for tears, waterproofing failure, or degradation, especially along seams and after extreme weather events.
Second Line Defense: Strategic Placement Away from Sprinklers
Location planning dramatically reduces water exposure risk.
Keep your Solo Stove:
- A minimum of 10 feet from automatic sprinkler zones
- Away from roof drip lines and under-eave water paths
- On slightly elevated ground to prevent puddle formation
- Protected from wind-driven rain when possible (near windbreaks like privacy screens)
Consider seasonal placement adjustments. Many owners create a dedicated “winter storage spot” with maximum protection during the off-season, while maintaining a more convenient but still protected usage location during primary fire pit seasons.
Third Line Defense: Quick-Drain Usage Surfaces
The surface beneath your Solo Stove significantly impacts water damage risk.
Ideal surfaces include:
Concrete pads with slight center elevation to encourage water runoff away from the stove base. Pavers set with small drainage gaps between them allow water to quickly escape.
Specialized fire pit platforms with built-in drainage features prevent water pooling.
For portable setups, consider a weather-resistant deck protector or fire pit mat with drainage channels. E
Even a simple 2-inch elevation on a properly sloped surface dramatically improves drainage and reduces moisture contact time.
Last Line Defense: Emergency Steps
When prevention fails, swift action makes all the difference. Refer to our emergency steps in the first section of this post to minimize damage after unexpected exposure.
Having these tools and knowledge ready before problems occur transforms potential disasters into minor inconveniences.
Remember: Each defense layer significantly improves your Solo Stove’s longevity. Implementing all four creates nearly bulletproof protection against the most common cause of fire pit damage.
Comprehensive Rain Protection Strategies
Prevention remains the most effective approach to Solo Stove rain damage, especially for larger models like the Yukon and Canyon.
Smart protection strategies cost far less than repeated cleanup efforts or premature replacement when your Solo Stove got rained on repeatedly.
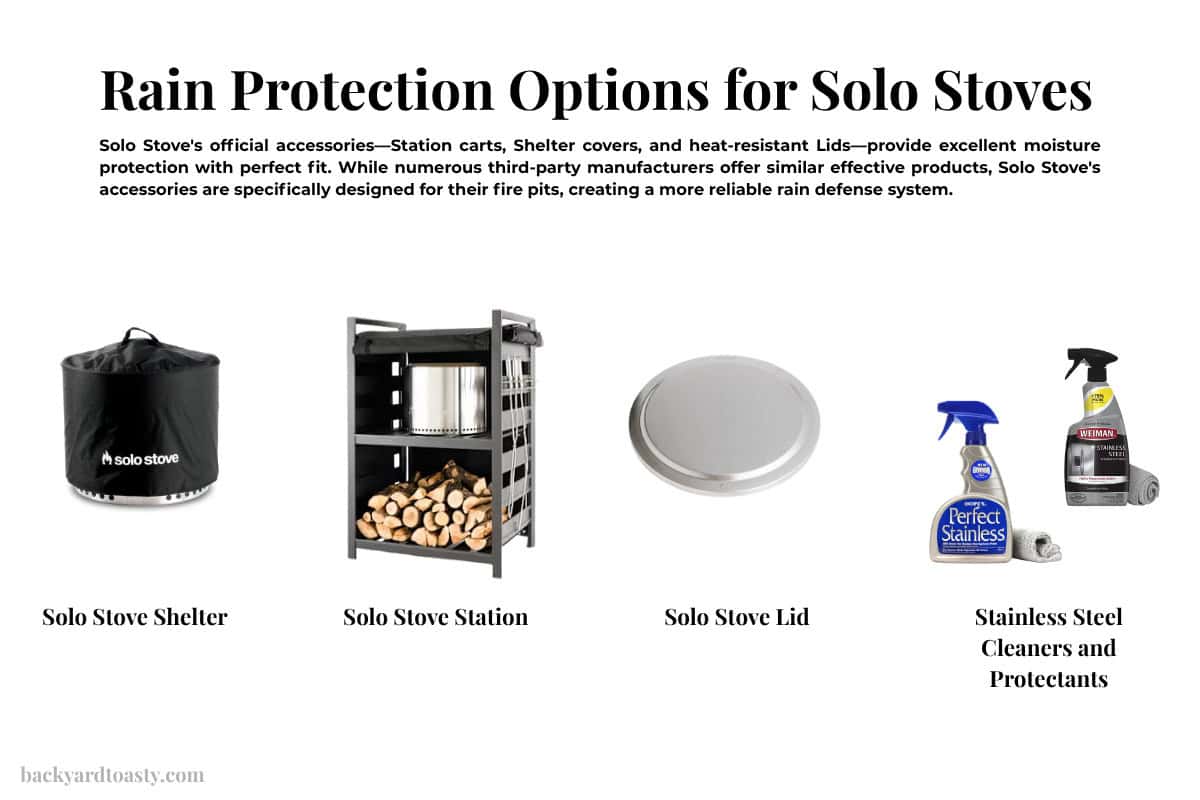
Official Solo Stove Protection Systems
Solo Stove Shelter Covers: These purpose-built covers offer the best protection for each model type, including the massive Canyon.
The PVC-coated polyester construction handles severe weather while maintaining breathability to prevent condensation buildup.
The covers feature reinforced stress points and weather-resistant zippers. Color options include black and gray, both designed to complement outdoor décor while providing maximum weather protection.
Canyon-Specific Cover Considerations: The Canyon’s 30-inch diameter requires the largest cover in the Solo Stove lineup.
Due to the size, these covers are susceptible to wind damage and require secure anchoring than smaller model covers.
Solo Stove Lids for Emergency Protection: Metal lids provide instant protection when unexpected weather strikes.
These discs completely cover the fire pit opening and work effectively with both original and 2.0 models across all Solo Stove sizes.
Canyon lids are particularly valuable given the massive opening size. The 30+ inch diameter lids provide substantial emergency protection but require secure placement to prevent wind displacement.
Fire Pit Rust Prevention Methods
Beyond basic covers, fire pit rust prevention for Solo Stoves requires understanding how moisture interacts with heat-stressed steel.
Professional-grade prevention includes:
- Protective Coatings: Apply food-safe stainless-steel protectants every 90 days
- Humidity Control: Use silica gel packets (i.e. Dry & Dry, WiseDry, etc), or a product like DampRid inside covered units during storage Fire pit rust prevention becomes especially important for coastal owners where salt air accelerates corrosion…
Third-Party and Custom Solutions
Professional Cover Manufacturers: Companies like Coverstore and Covers & All specialize in custom fire pit covers, including options for the large Canyon model. These options provide enhanced durability and color choices beyond official offerings.
Custom covers work particularly well for Canyon owners with unique outdoor setups. The large size makes aesthetic integration important, and custom options provide better design flexibility.
Canyon DIY Challenges: Creating effective DIY protection for Canyon models presents unique challenges due to the 30-inch opening. Standard household items rarely provide adequate coverage, making purpose-built protection essential for Canyon owners than smaller models.
Advanced Protection Integration
Outdoor Kitchen Integration: Fire pits incorporated into outdoor kitchen designs can benefit from overhead protection structures. This approach works especially well for Canyon installations due to their permanent nature and large footprint.
Consider wind patterns and smoke direction when planning overhead protection. Canyon models require clearance and stronger support structures due to their size and heat output.
Seasonal Storage Solutions: Winter storage provides the ultimate rain protection while extending overall lifespan. This strategy completely eliminates the possibility that your Solo Stove got rained on during off-season months. Canyon models present unique storage challenges due to their size and weight.
Canyon Storage Considerations: The Canyon’s 30-inch diameter and substantial weight make storage complex than smaller models. Dedicated storage solutions or professional storage services may be necessary for Canyon owners without adequate space.
2.0 Model Storage Advantages: Canyon 2.0 models offer some storage benefits through component removal, though the parts remain larger and heavier than other models. Even disassembled, Canyon components require substantial storage space.
Long-Term Maintenance and Rust Prevention
Essential Solo Stove Maintenance After Rain Exposure
Regular Solo Stove maintenance becomes even more critical if your fire pit frequently gets caught in unexpected weather.
After any rain incident, establish a maintenance routine that includes:
– Weekly visual inspections of the flame ring and ash pan area
– Monthly deep cleaning with Bar Keepers Friend
– Quarterly protective coating applications
Model-Specific Maintenance Challenges
The cleanup process varies dramatically depending on your model (Ranger, Bonfire, Yukon, or Canyon) and whether you’re dealing with Solo Stove 2.0 rain damage versus original models. The 2.0’s removable ash pan significantly reduces cleanup time and rust risk.
Canyon Maintenance Complexity: The Canyon’s large size makes routine maintenance time-consuming and physically demanding. Regular inspections require effort due to the expanded surface area and interior volume.
Monthly inspections become critical for Canyon models due to the increased surface area where problems can develop. The large interior makes it easier to miss developing issues without systematic inspection approaches.
Rust Prevention Strategies by Model Size
Size-Based Risk Assessment: Larger models like the Yukon and Canyon face higher rust risks due to increased surface area and water collection capacity. This makes prevention strategies critical for these models.
The Canyon’s massive opening makes it particularly vulnerable to rain exposure. Even brief storms can deposit substantial water volumes that require immediate attention to prevent damage.
Graduated Protection Approaches: Consider investing heavily in protection for larger models. The replacement cost and cleanup difficulty justify premium protection solutions for Yukon and Canyon models than smaller fire pits.

Emergency Rain Response Strategies
Model-Specific Emergency Protocols
Canyon Emergency Challenges: The Canyon’s size creates unique emergency response challenges. Quick covering requires larger materials and secure anchoring due to wind resistance.
Emergency drainage for Canyon models absolutely requires multiple people. Never attempt single-person emergency cleanup on water-filled Canyon models due to safety risks.
Staged Response Strategies: Develop model-appropriate emergency response plans. Canyon owners need different strategies than Ranger owners due to the physical demands and safety considerations.
Understanding what to do when your Solo Stove got rained on unexpectedly can prevent panic and ensure you take the right steps immediately. Having emergency supplies readily available makes the difference between quick recovery and extensive damage.
Solo Stove Model Comparison for Rain Resilience
Cleanup Difficulty Rankings
Easiest to Most Challenging:
- Ranger – Manageable size, lightest weight, quickest drying
- Bonfire – Moderate size, single-person cleanup possible
- Yukon – Large size, two-person cleanup recommended
- Canyon – Largest size, multiple people required, most challenging
Solo Stove Post-Rain Cleanup Difficulty
Cleanup Difficulty Rankings
Easiest to Most Challenging:
- Ranger – Manageable size, lightest weight, quickest drying
- Bonfire – Moderate size, single-person cleanup possible
- Yukon – Large size, two-person cleanup recommended
- Canyon – Largest size, multiple people required, most challenging
Protection Investment Priorities
High Priority Models: Canyon and Yukon owners should prioritize premium protection due to cleanup difficulty and replacement costs. The investment in quality covers and storage pays for itself quickly.
Moderate Priority Models: Bonfire owners benefit significantly from protection but have flexibility in solution choices due to manageable cleanup options.
Lower Priority Models: Ranger owners have the most flexibility in protection strategies due to easier cleanup and lower replacement costs.
Note: For specific questions about rain protection for your Solo Stove model, please consult with your local or online Solo Stove dealer. They can provide personalized recommendations based on your climate and usage patterns.
Protection Investment Priorities
High Priority Models: Canyon and Yukon owners should prioritize premium protection due to cleanup difficulty and replacement costs. The investment in quality covers and storage pays for itself quickly.
Moderate Priority Models: Bonfire owners benefit significantly from protection but have flexibility in solution choices due to manageable cleanup options.
Lower Priority Models: Ranger owners have the most flexibility in protection strategies due to easier cleanup and lower replacement costs.
Solo Stove Warranty and Rain Damage Coverage
Many owners wonder if Solo Stove warranty rain damage is covered under their lifetime guarantee.
Here’s what you need to know: Solo Stove’s warranty covers manufacturing defects but considers rain exposure “normal wear and tear.”
However, proper maintenance following our guide ensures your warranty remains valid for actual defects.
Solo Stove rust warranty coverage specifically excludes surface rust from improper maintenance.
However, structural rust that affects performance may be covered if you’ve followed proper care guidelines—another reason immediate rain cleanup matters.
Wrap-up: Your Solo Stove Got Rained On
Rain exposure represents one of the most common challenges Solo Stove owners face, but the impact varies dramatically by model size.
Whether your Solo Stove got rained on once or multiple times, Canyon owners face the greatest challenges, while Ranger owners have the most manageable cleanup requirements.
The investment in protection and maintenance pays increasing dividends as model size increases. Canyon and Yukon owners should prioritize premium protection solutions, while smaller model owners have flexibility in their approach.
Remember that 2.0 models offer significant advantages for rain-prone environments across all sizes. However, even Canyon 2.0 models require careful handling due to component size and weight.
Most importantly, develop systems and habits that make protection automatic rather than reactive. This becomes increasingly critical as model size increases, with Canyon owners needing the most robust prevention strategies.
Your Solo Stove represents a significant investment in outdoor enjoyment, with larger models representing substantial financial commitments.
With proper care and quick response when your Solo Stove got rained on, any Solo Stove model will continue providing excellent fires and lasting memories for many years to come.
Build confidence through preparation, act quickly when rain strikes, and choose protection strategies appropriate to your specific model’s challenges and requirements.
FAQs: Wrap-up: Your Solo Stove Got Rained On
Key Takeaways
- Act quickly within 24 hours if your Solo Stove got rained on to prevent permanent rust damage.
- Follow our 5-step emergency cleanup guide, tailored for different Solo Stove models, to restore your fire pit.
- Immediate action helps prevent micro-rust formations from forming due to prolonged water contact on heat-stressed steel.
- Use proper covers, strategic placement, and quick-drain surfaces to prevent future water damage.
- Regular maintenance and quick-response practices are essential to prolong the lifespan of your Solo Stove.
